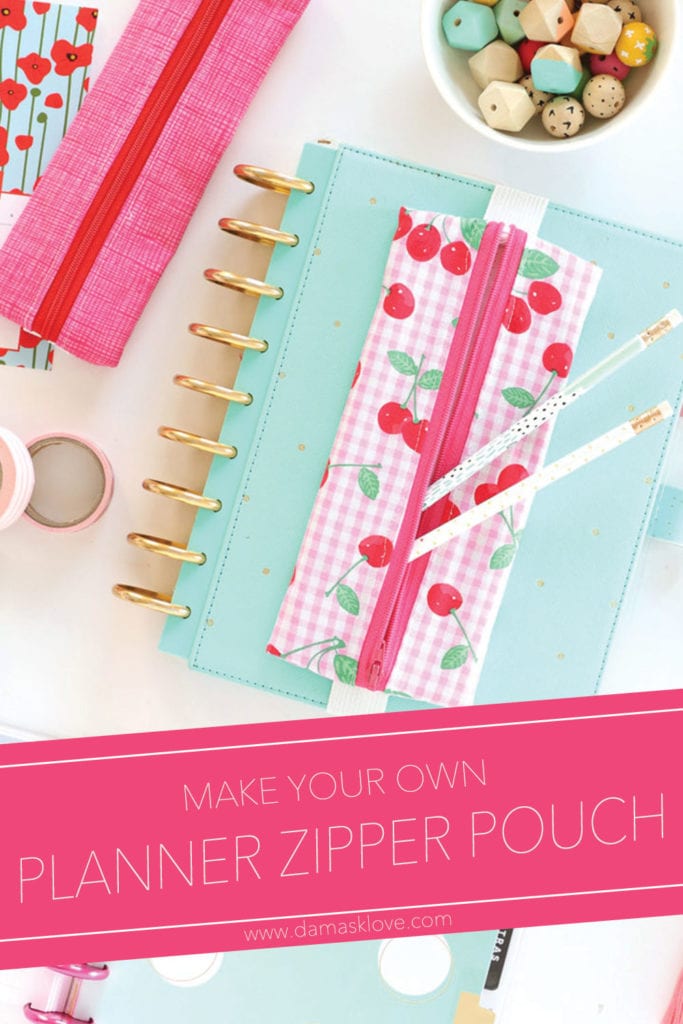
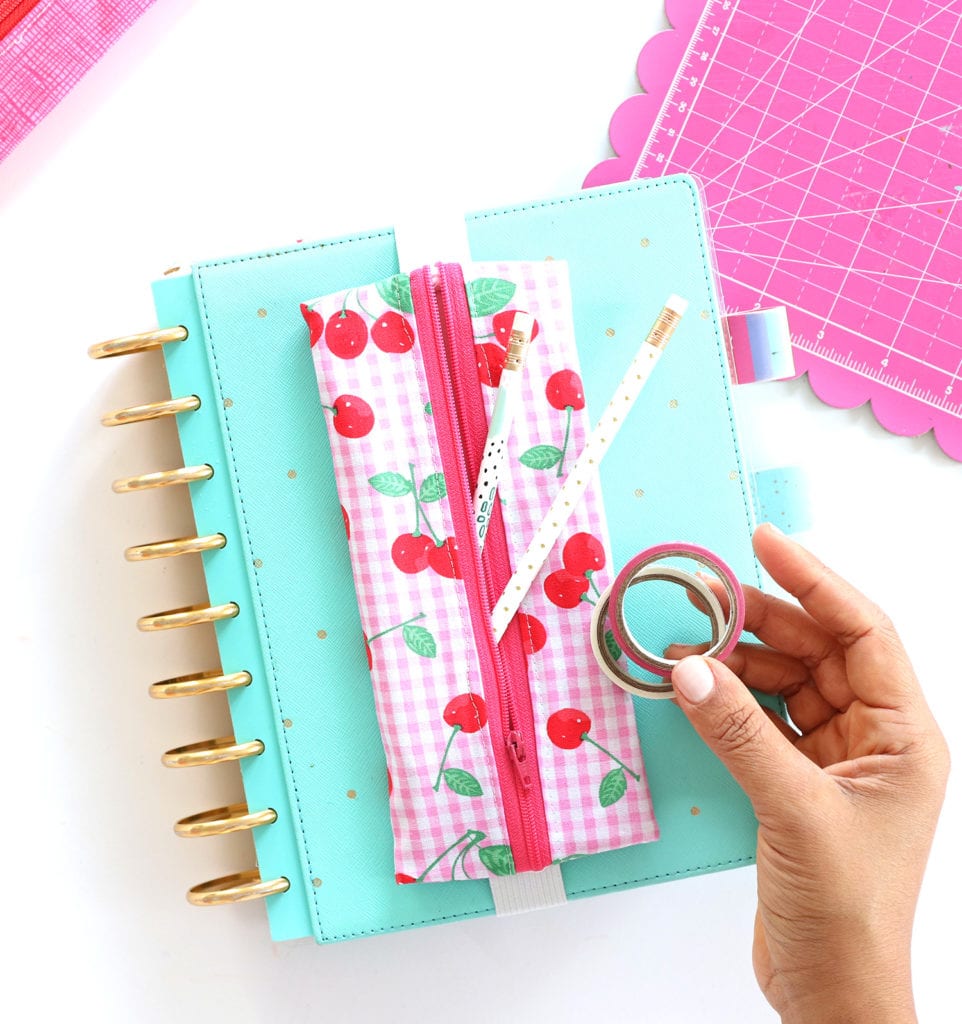
Let’s be honest – one of the best parts of having a planner is adding on all the goodies that make planning fun. The stickers, the pens, the clips and of course the pouches.
I’m a big fan of a cute zipper pouch. I own way too many and after today’s tutorial, I’m going to own a whole lot more of them. This planner zipper pouch is the perfect project for beginning sewers! Just a few straight stitches and you’ve got a planner zipper pouch that will fit on your on your favorite notebook or journal
Now, sit back, relax and WATCH as I walk you through each step of this easy project. Be sure to share your version with me on social media! Tag @damasklove so I can see how your planner zipper pouch turns out!

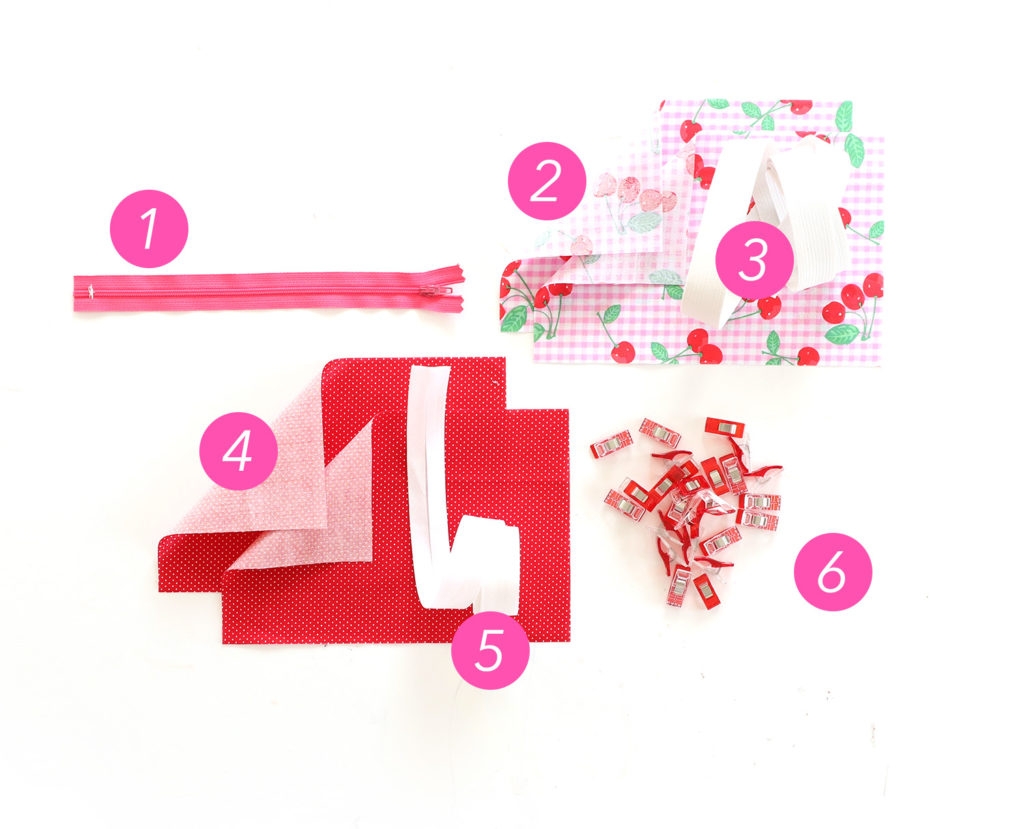
You’ll need:

Notice: JavaScript is required for this content.
I’m a big fan of a cute zipper pouch. I own way too many and after today’s tutorial, I’m going to own a whole lot more of them. This planner zipper pouch is the perfect project for beginning sewers! Just a few straight stitches and you’ve got a planner zipper pouch that will fit on your on your favorite notebook or journal
Now, sit back, relax and WATCH as I walk you through each step of this easy project. Be sure to share your version with me on social media! Tag @damasklove so I can see how your planner zipper pouch turns out!
You’ll need:
- Zipper
- Two pieces of “outer fabric” cut to 9″ x 6″
- Wide elastic
- Two pieces of liner fabric cut to 9″x 6″
- Extra Wide Double Fold Bias Tape
- WonderClips
WATCH ME MAKE THIS PROJECT LIVE ON FACEBOOK!
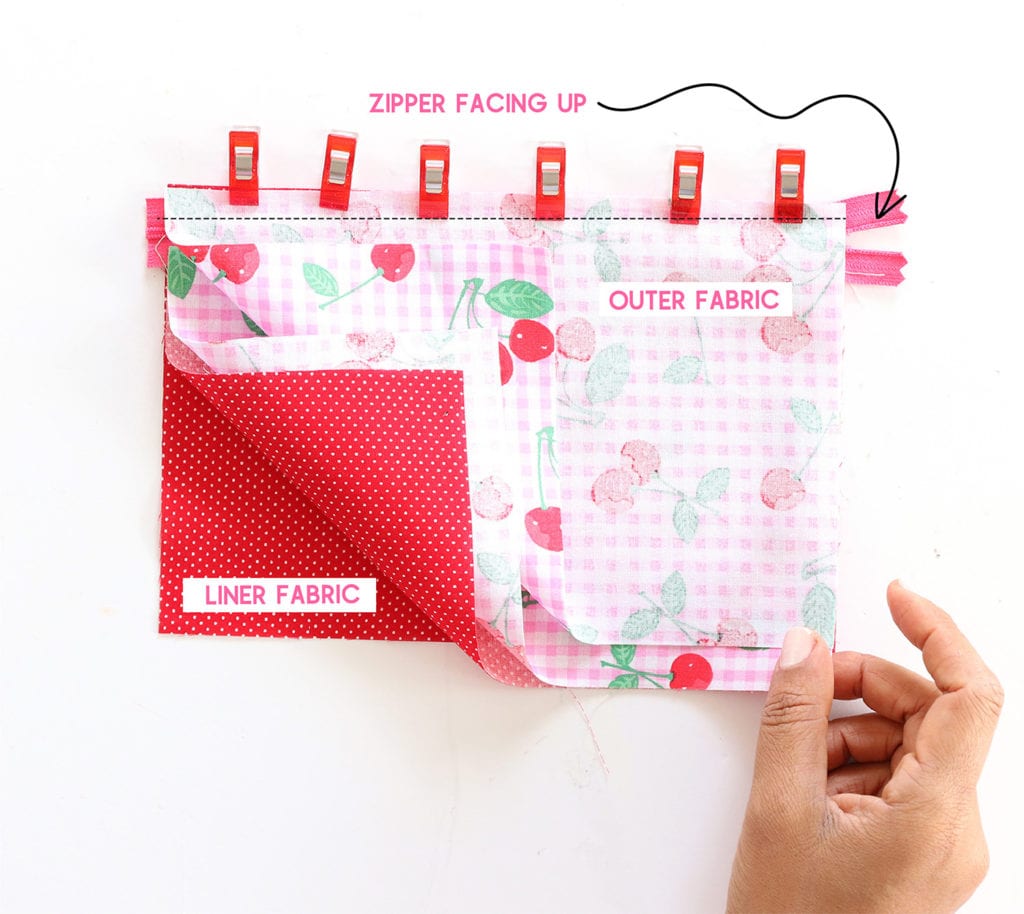
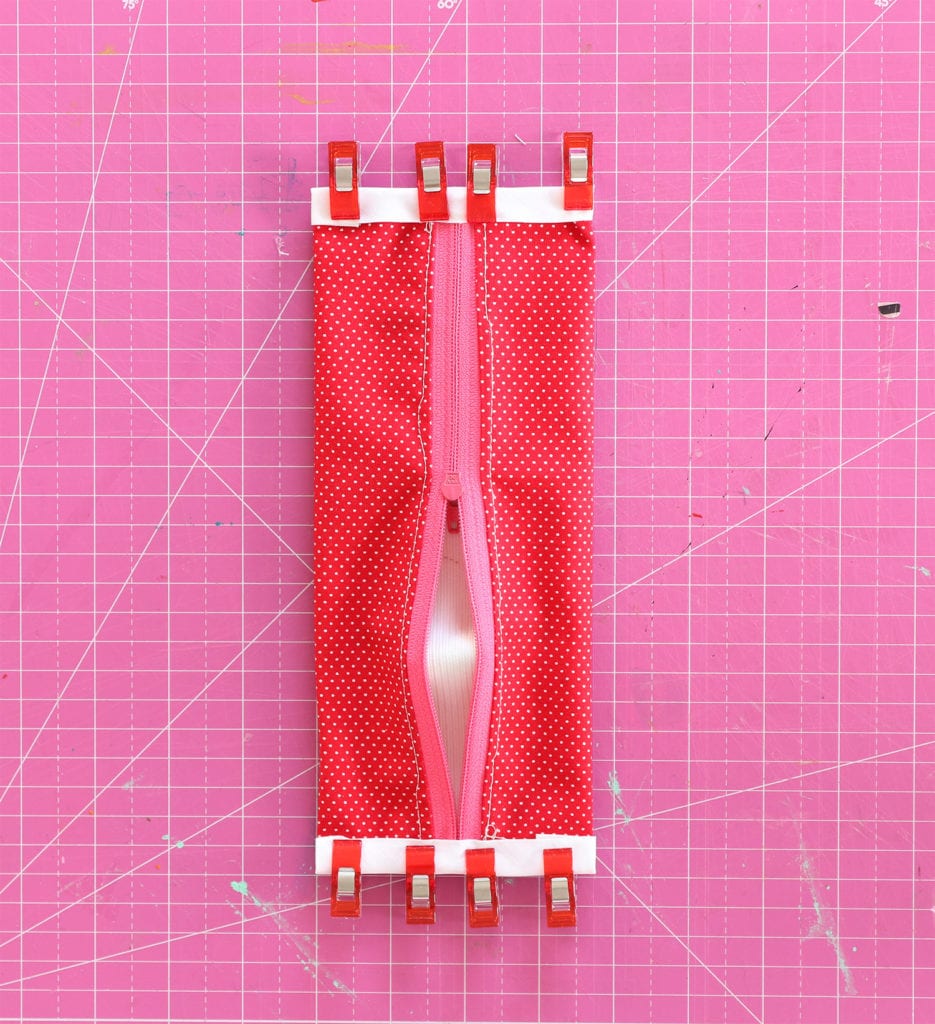
STEP ONE:
Lay the outer fabric on your work surface with the right-side facing up. Lay the zipper face-down on your work surface so that the top edge of the zipper aligns with the top edge of the outer fabric. Lay the liner fabric right-side down on top of the zipper so that top edges line up. Clip the pieces together and stitch across the top as shown above.
Lay the outer fabric on your work surface with the right-side facing up. Lay the zipper face-down on your work surface so that the top edge of the zipper aligns with the top edge of the outer fabric. Lay the liner fabric right-side down on top of the zipper so that top edges line up. Clip the pieces together and stitch across the top as shown above.
Notice: JavaScript is required for this content.
STEP TWO
With the first layer of fabrics stitched into place, arrange the second pair of fabrics as shown and sew into place.
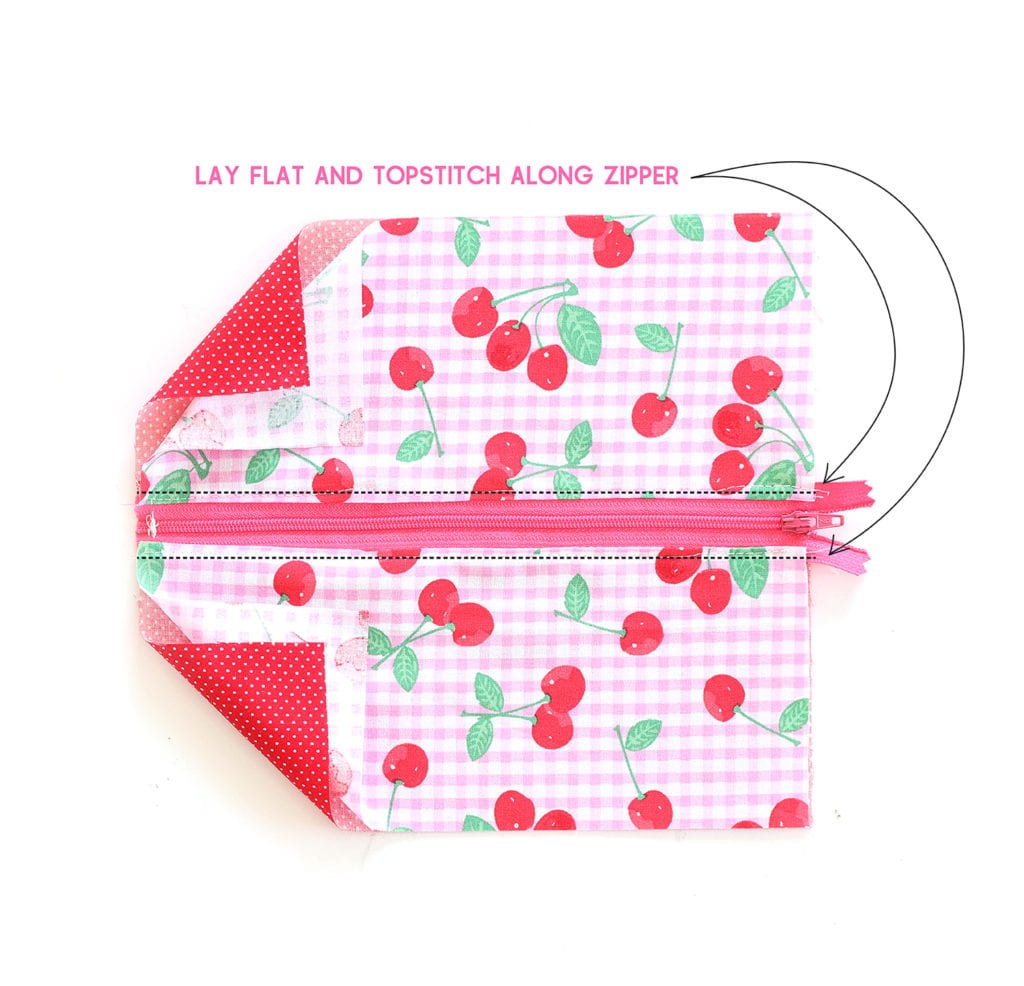
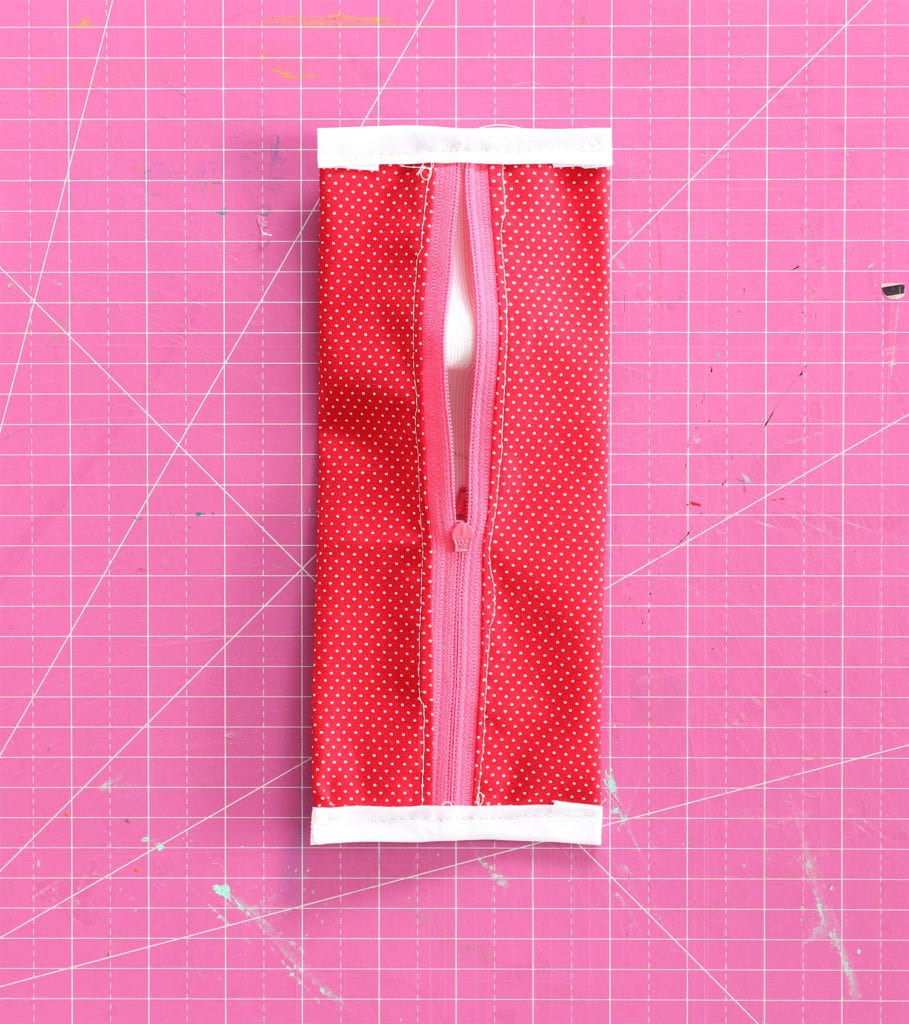
STEP THREE:
Lay out the project as shown and press the seams if needed. Finish off with a top-stitch as shown.
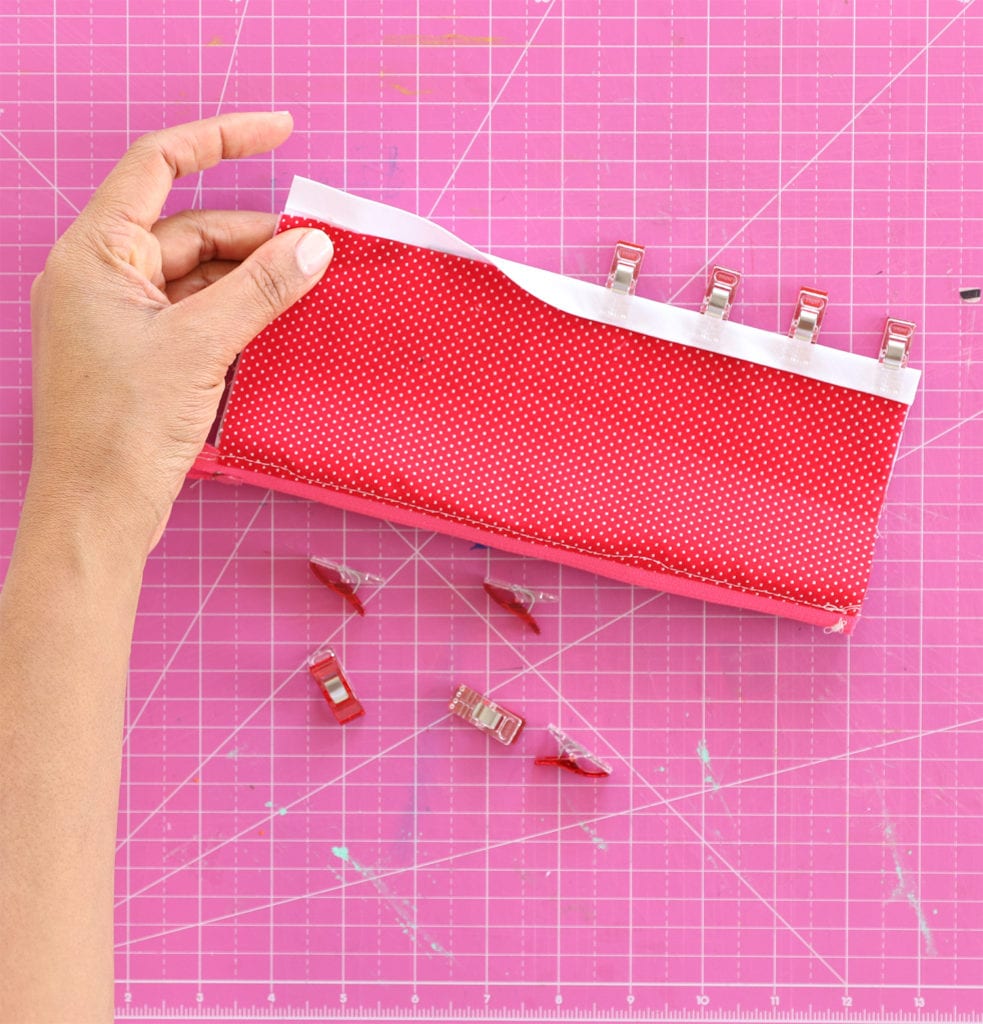
STEP FOUR:
Fold the zipper pouch so that the liner fabric is on the outside. Fold the bias tape over the raw edges and clip into place. Sew into place.
STEP FIVE:
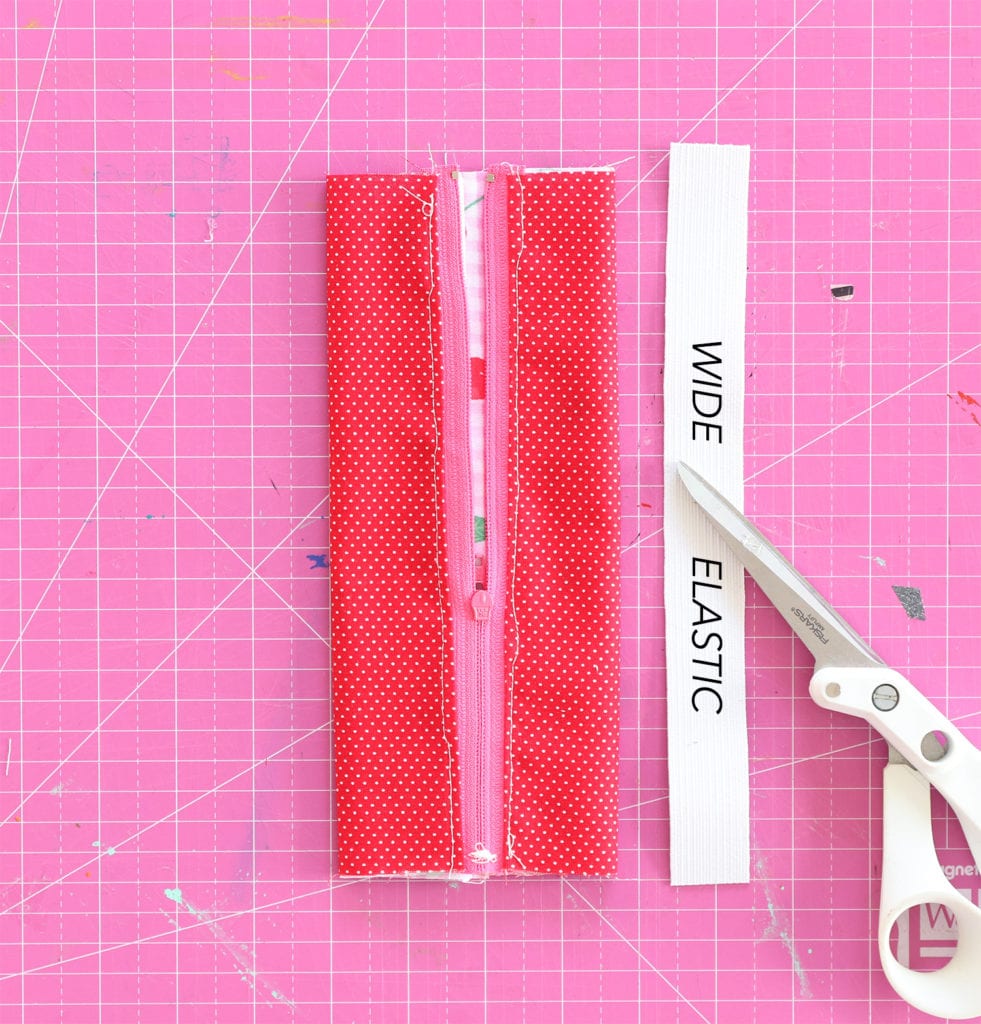
Cut a piece of wide elastic that is about .5″-1″ longer than the pouch
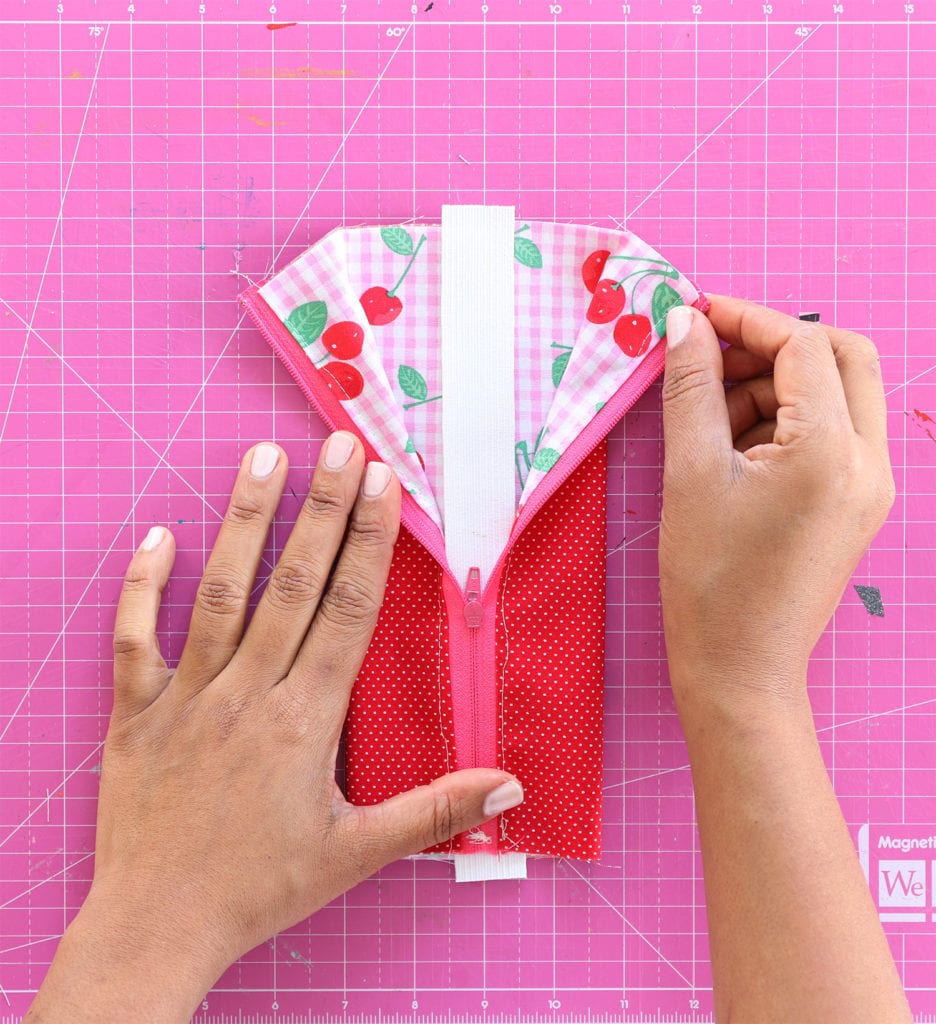
STEP SIX:
Place the wide elastic into the bag as shown.
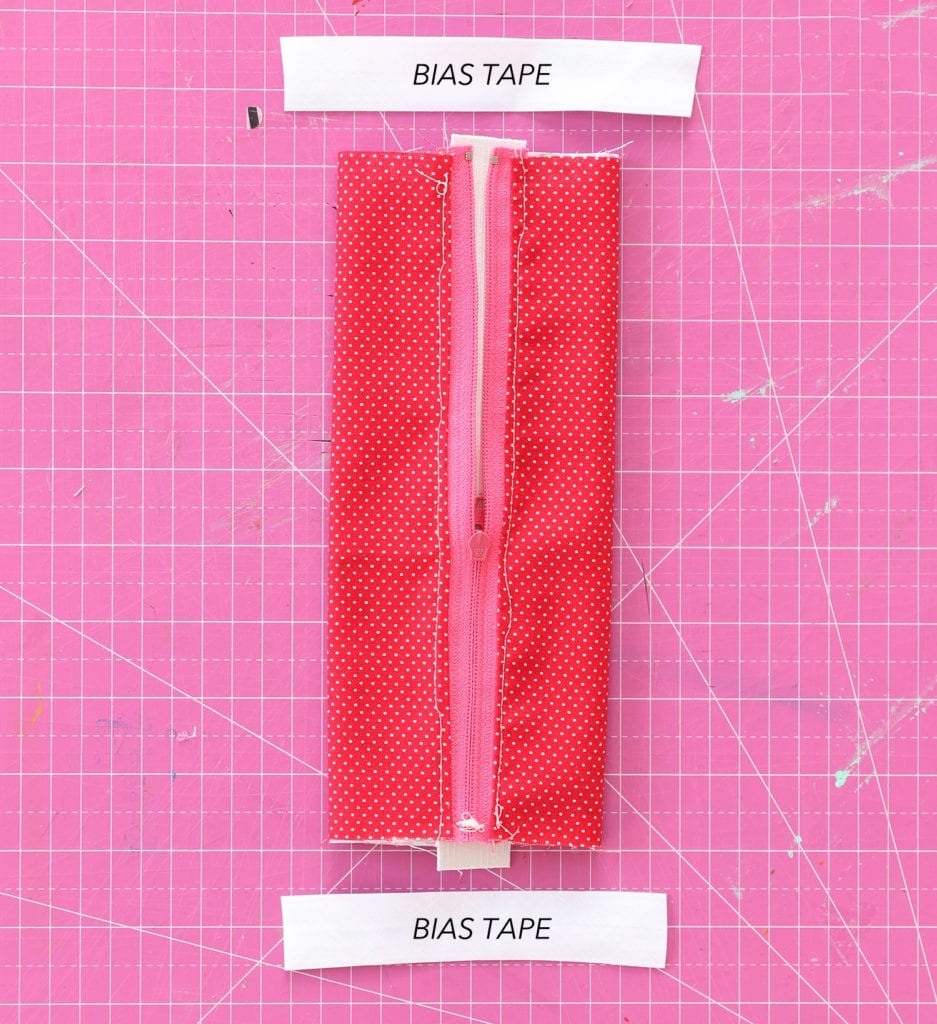
STEP SEVEN:
Cut two pieces of bias tape. Each piece should be about 1″ wider than the width of the zipper pouch.
STEP EIGHT:
Fold the bias tape over the raw edges and clip into place. Stitch into place. DONE!

The post How to Make a Planner Zipper Pouch appeared first on Damask Love.
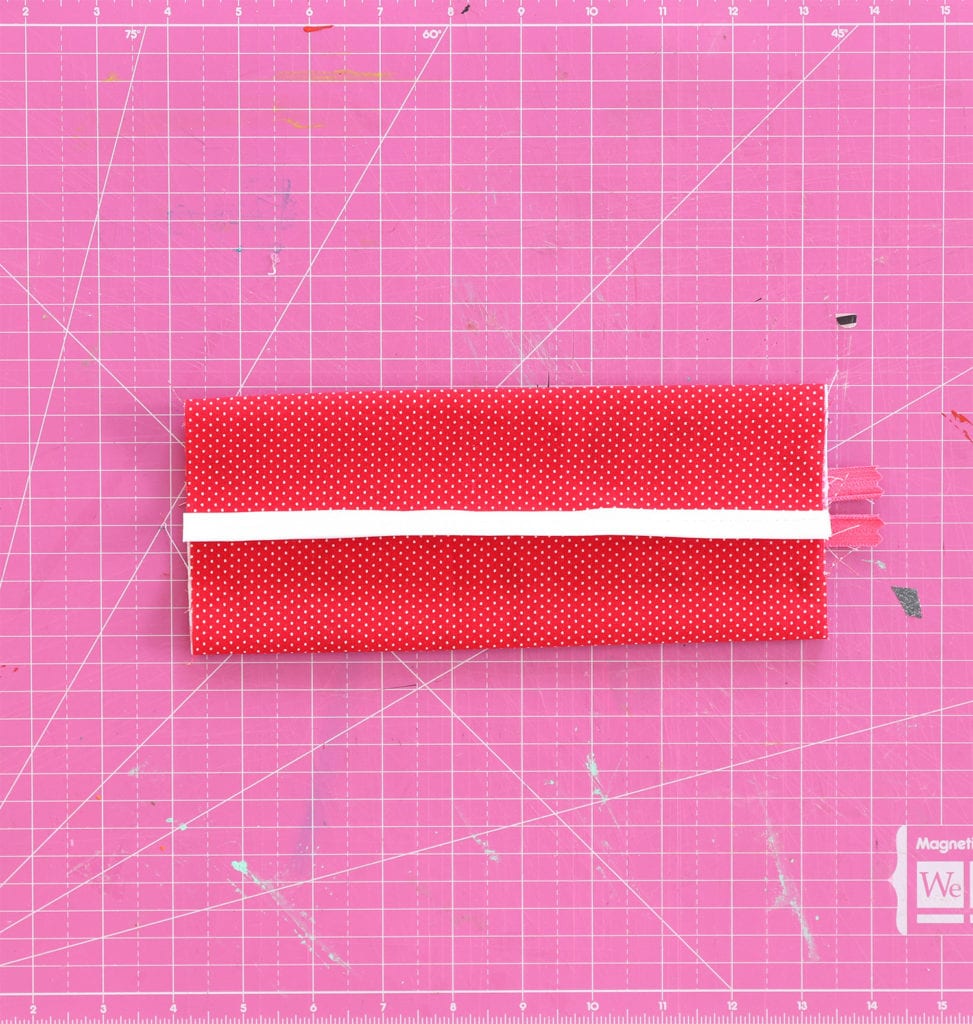
STEP TWO
With the first layer of fabrics stitched into place, arrange the second pair of fabrics as shown and sew into place.
With the first layer of fabrics stitched into place, arrange the second pair of fabrics as shown and sew into place.
STEP THREE:
Lay out the project as shown and press the seams if needed. Finish off with a top-stitch as shown.
Lay out the project as shown and press the seams if needed. Finish off with a top-stitch as shown.
STEP FOUR:
Fold the zipper pouch so that the liner fabric is on the outside. Fold the bias tape over the raw edges and clip into place. Sew into place.
STEP FIVE:
Cut a piece of wide elastic that is about .5″-1″ longer than the pouch
STEP SIX:
Place the wide elastic into the bag as shown.
STEP SEVEN:
Cut two pieces of bias tape. Each piece should be about 1″ wider than the width of the zipper pouch.
STEP EIGHT:
Fold the bias tape over the raw edges and clip into place. Stitch into place. DONE!
Fold the bias tape over the raw edges and clip into place. Stitch into place. DONE!

The post How to Make a Planner Zipper Pouch appeared first on Damask Love.